Contents
ToggleWhat is an Alarm in iX Developer?
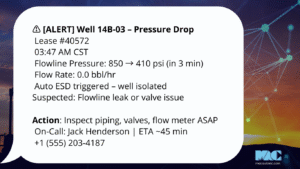
In iX Developer, an alarm is a notification mechanism triggered when a tag’s value meets certain conditions (e.g., exceeding a threshold, going below a threshold, or matching a specific value). Alarms can let operators know that immediate attention or action may be required.
Use Case
An example might be a temperature sensor tag. If the tag’s value exceeds a safe limit, you can trigger an alarm. Then, the operator can open an Alarm screen to see the details.
Alarms are crucial to any HMI project that needs to notify operators of important events or statuses. With iX Developer’s built-in alarm functionality, you can quickly configure robust alarm handling and display mechanisms. And, by adding custom C# code where needed, you gain flexibility for more advanced scenarios.
The below guide explains how to:
- Create or select a tag for alarm monitoring.
- Add alarms to that tag by defining conditions, messages, and severity levels.
- Build a dedicated Alarm screen using the AlarmViewer control.
- Add a button on your main screen to navigate to the Alarm screen.
- Optionally, use C# scripts to further customize alarm behaviors or programmatic navigation.
Legend and Overview
Tag: A named variable holding data (e.g., temperature).
Alarm: A notification triggered by a tag’s value meeting certain conditions.
AlarmViewer: The control on the HMI screen that lists and displays alarms.
Open Screen / ShowScreen: An action or method to display a different screen in iX Developer.
C# Code-behind: Optional scripting layer in iX Developer for advanced functionality.
Want a headstart on your iX Developer Alarm?
Download a demonstration project as a go-by to help with your project integration.
Complete the form and we’ll send a download link to the email provided.
Creating or Selecting a Tag for Alarming
- Open or create a project in iX Developer.
- Navigate to the Tags view (often accessible in the Project Explorer pane or via Project > Tags in the menu).
- If you already have a tag you want to monitor for alarm conditions, select it. Otherwise, create a new tag:
- Click Add Tag (or New Tag).
- Give the tag a descriptive Name (e.g., TemperatureSensor).
- Set the Data Type and Data Source as needed (Internal or connected to an external device).
Example
- Name: TemperatureSensor
- Data Type: Float (if you expect decimal values)
- Data Source: Internal or Modbus, etc.
Defining Alarms in Tag Properties
- Select the Tag in the Tags list (e.g., TemperatureSensor).
- In the Properties panel, locate the Alarms or Alarm Settings section.
- Click Add to create a new alarm condition. You will typically define:
- Alarm Text: A descriptive message (e.g., “High Temperature Alarm”).
- Trigger Condition: For example, Value > 50.0 if you want to raise an alarm when temperature exceeds 50°C.
- Severity/Group: Allows you to prioritize or categorize alarms.
- Acknowledgement: Whether or not the operator must acknowledge the alarm.
- Save your settings. You have now configured the alarm for that specific tag.
Tip
- You can create multiple alarm conditions (e.g., “High Temperature” and “Overheating Danger” at a higher threshold) for the same tag.
- Each alarm can have a unique severity (e.g., Warning, Critical, etc.).
Creating an Alarm Screen
- Add a new screen to your project:
- Click on the Insert menu on the top ribbon and select Screen’.
- Right click on the new screen in the project explore, select Rename and name the screen something like AlarmSceen.
- Open the new AlarmScreen by double-clicking it in the Project Explorer.
- (Optional) Adjust the size or background color to differentiate it from your main screen.
Adding an Alarm Viewer Control
- Select the Home tab from the top ribbon, in the Objects dropdown find the Alarm Viewer and Select it.
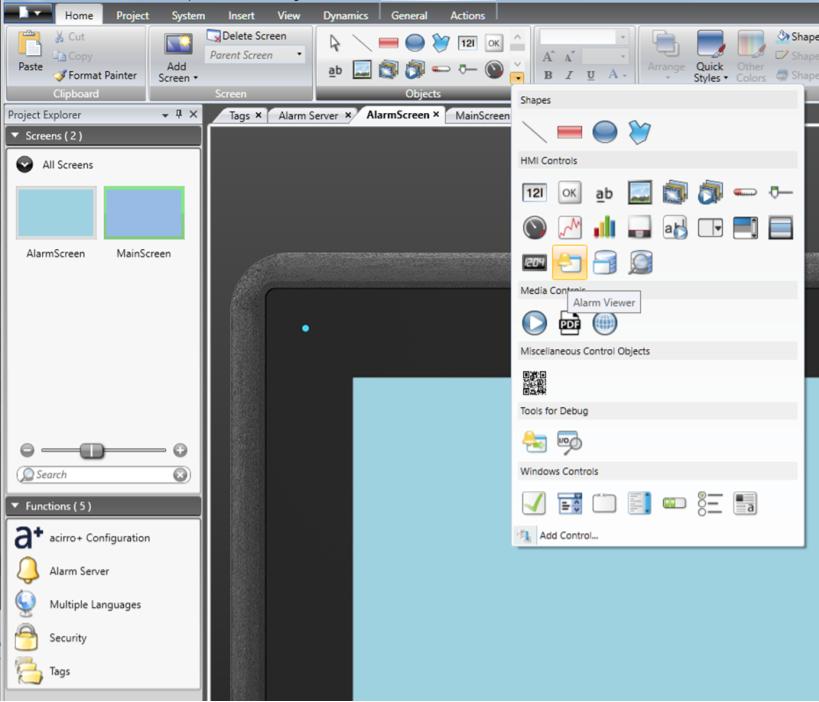
- Now you can select an area on the screen to add the new Alarm Viewer.
- Position and resize the AlarmViewer as desired.
- With the AlarmViewer selected, check the Properties panel for customizable settings:
- Columns: Configure which columns (Timestamp, Alarm Text, Acknowledged, etc.) you wish to display.
- Colors and Fonts: Customize the look and feel of the alarm list.
Navigating to the Alarm Screen from Another Screen
To allow operators to open the AlarmScreen, you’ll typically create a button on your main screen (or any other screen):
- Open your main screen (or whichever screen should link to AlarmScreen).
- Add a Button:
- From the Toolbox, drag a Button control onto the screen.
- Label the button (e.g., “View Alarms”).
- In the Properties or Actions of the button, choose an OnClick (or Click Action) and set the Action:
- Select Open Screen (or “Show Screen” action type).
- In the dropdown, select AlarmScreen.
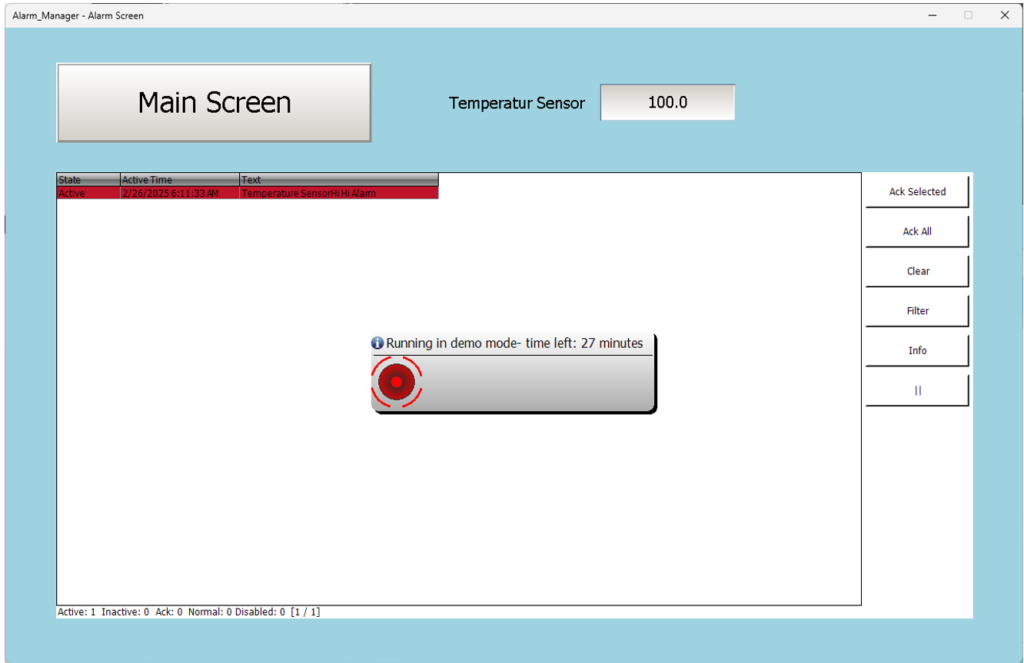
- Test by running a simulation or deploying to the device:
- Clicking this button should navigate the user to the AlarmScreen, displaying the AlarmViewer with any active or past alarms.
C# Code Snippets for Additional Customization
If you want more advanced control over how alarms are handled, or if you want to dynamically show/hide the Alarm screen under certain conditions, you can leverage the C# scripting interface in iX Developer. Below are a few examples.
Navigating to the Alarm Screen Programmatically
Suppose you have a button control named btnShowAlarms on your main screen, and you want to open AlarmScreen in code. In iX Developer, double-click btnShowAlarms to open the code-behind file, then add:
					using System;
using Neo.ApplicationFramework.Interfaces;
namespace Neo.ApplicationFramework.Generated
{
    public partial class MainScreen
    {
        void btnShowAlarms_Click(object sender, EventArgs e)
        {
            // This assumes your Alarm screen is named AlarmScreen
            // The method ShowScreen is typically provided in the iX environment.
            ShowScreen("AlarmScreen");
        }
    }
}
Triggering an Alarm Programmatically
In some cases, you might want to trigger an alarm directly from code rather than only relying on tag values and thresholds. For instance, if you have some complex logic that detects an error condition:
					using System;
using Neo.ApplicationFramework.Tools.Alarm;
using Neo.ApplicationFramework.Interfaces;

namespace Neo.ApplicationFramework.Generated
{
    public partial class MainScreen
    {
        void CheckSystemHealth()
        {
            // Example logic (Pseudo-code)
            bool isErrorDetected = (some condition);
            if (isErrorDetected)
            {
                // Suppose 'AlarmManager' is accessible in your environment
                IAlarmManager alarmManager = AlarmManager.Instance;
                alarmManager.RaiseAlarm("CustomErrorAlarm");
            }
        }
    }
}
This code sample assumes you have already created an alarm definition in iX Developer with the name “CustomErrorAlarm.”
Next Steps
- Experiment with different alarm conditions (e.g., warning vs. critical).
- Explore other alarm features like Historical Alarm Lists, Alarm Acknowledgement, and Logging.
- Incorporate color-coding or pop-up messages to highlight critical alarms.
With these steps, your project should have a fully functioning alarm system that can be easily accessed by operators at runtime.